1 Weekly Routine Maintenance
Weekly maintenance ensures hygiene, durability and optimal performance of the Turkish bath.
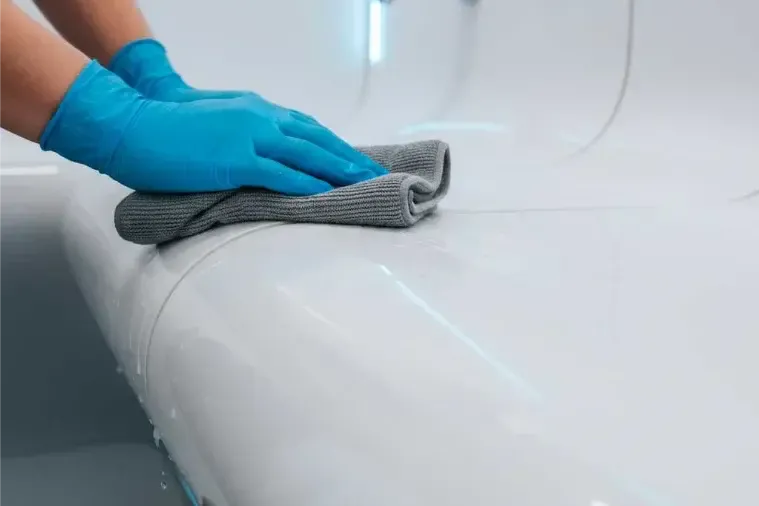
1.1 Acrylic Surface Cleaning
- Turn off and let the cabin cool completely
- Prepare gentle cleaning solution: warm water + neutral pH 7 detergent
- Dampen a soft microfiber cloth in the solution
- Clean all acrylic surfaces with gentle circular movements
- Rinse with clean cloth dampened with water
- Dry with soft dry cloth to avoid streaks
- Leave the door open for complete ventilation
WARNING: NEVER use abrasive products, alcohol, acetone, ammonia or aggressive detergents on acrylic surfaces. They irreparably damage the material causing opacification and cracks.
1.2 Recommended and Prohibited Products
| Type | Recommended Products | Prohibited Products |
|---|---|---|
| Acrylic surfaces | Neutral detergent, diluted Marseille soap, acrylic-specific cleaners | Bleach, alcohol, acetone, abrasive products, rough sponges |
| Rubber gaskets | Damp cloth, neutral detergent | Oils, greases, solvents |
| Steam diffuser | White vinegar diluted 1:3 with water | Strong acids, aggressive descalers |
1.3 Gasket Cleaning
Rubber gaskets require special attention to maintain hermetic seal:
- Clean periodically with damp cloth and neutral detergent
- Remove any lime residues with diluted white vinegar
- Dry thoroughly to prevent mold
- Visually verify integrity (absence of cracks or tears)
- Check that they are well adhered to panels
1.4 Steam Diffuser Cleaning
- Clean the steam diffuser with white vinegar and water solution (1:3)
- Clean steam outlet holes with soft brush
- Rinse abundantly with clean water
2 Steam Generator Maintenance
2.1 Daily Cleaning and Management
WARNING: Any steam leak can damage the appliance. Regularly check the seal of all connections.
Water quality is fundamental for steam generator durability. In case of very hard water it is mandatory to install a water softener upstream.
2.2 Boiler Descaling
The frequency of descaling depends on water hardness in the installation area:
| Water Hardness | °F (French degrees) | Descaling Frequency |
|---|---|---|
| Soft | 0-15°F | Every 12 months |
| Medium | 15-25°F | Every 6 months |
| Hard | 25-40°F | Every 3 months |
| Very hard | over 40°F | Every 2 months (softener mandatory) |
NOTE: It is possible to verify water hardness through test kits available at hardware stores or by contacting the local water provider.
2.3 Descaling Procedure
- Turn off the generator and disconnect from electrical network
- Wait for complete cooling (at least 2 hours)
- Close the water supply tap
- Open the boiler drain cap and empty completely
- Prepare descaling solution: 1 liter water + 200 ml white vinegar (or specific product)
- Pour the solution into the boiler through the filling opening
- Let it act for 3-4 hours
- Empty the solution completely
- Rinse with clean water
- Close drain cap and reopen water supply
- Reconnect electrically and perform an empty test cycle
WARNING: Do not use aggressive descaling products containing hydrochloric or muriatic acid. They damage heating elements and generator probes.
WARNING: Avoid overheating. It could accelerate potential corrosion problems.
2.4 Automatic Drain System Check
Verify monthly the correct functioning of the automatic drain system:
- Perform a complete 30-minute cycle
- At the end, verify that "d" or "dd" (drain) appears on display
- Listen to the sound of water flowing out
- Verify that the drain is complete (absence of water residues)
- The display will show "-d" when drainage is completed
- If drain does not occur: check drain pipe is clear
- If it persists: call support to check solenoid valve
NOTE: Automatic drainage is important to maintain generator efficiency. Never interrupt this cycle.
2.5 Solenoid Valve Check
Verify the correct functioning of the inlet and drain solenoid valves:
| Component | Verification | Frequency |
|---|---|---|
| Inlet solenoid valve | Complete opening/closing, absence of leaks, regular filling time (max 10 minutes) | 6-8 months |
| Drain solenoid valve | Complete opening/closing, total boiler emptying | 6-8 months |
| Copper pipes | Absence of oxidation, intact welds, secure fixings | 6-8 months |
3 Annual Maintenance (intensive/professional use)
3.1 Complete Overhaul by Specialized Technician
Annual maintenance must be performed by authorized Beauty Luxury technician and includes:
| Component | Intervention |
|---|---|
| Generator boiler | Professional descaling, internal inspection, gasket replacement if necessary |
| Electric heating elements | Condition check, possible replacement if damaged or encrusted |
| Temperature probes | Calibration, accuracy test, possible replacement |
| Control panel | Functionality verification, test all buttons and display |
| Solenoid valves | Disassembly, cleaning, operation test, possible replacement |
| Electrical system | Insulation test, grounding verification, tightness check |
| Pipes | Complete inspection, seal test, fixings verification |
| Cabin gaskets | Steam seal verification, possible replacement if deteriorated |
| Lighting | Functionality check, bulb replacement if necessary |
3.2 Standard Component Replacement
Some components have limited lifespan and require scheduled replacement:
| Component | Average Lifespan | Replacement Signs |
|---|---|---|
| Electric heating elements | 3-5 years | Increased heating time, frequent error code -H, excessive encrustations |
| Temperature probe | 4-6 years | Inaccurate readings, error code -L or -H, unstable temperatures |
| Solenoid valves | 5-7 years | Leaks, failed filling/draining, abnormal noises |
| Boiler gaskets | 2-3 years | Water leaks, steam escaping, frequent refill needed |
| Cabin door gaskets | 3-5 years | Visible steam escape, thermal efficiency loss |
WARNING: Heating element replacement must be done with generator off. Follow the indications inside the unit for screws and wiring. The operation must be performed by specialized professional personnel.
4 Common Problems and Solutions
4.1 Performance Problems
| Problem | Probable Cause | Solution |
|---|---|---|
| Insufficient steam | Lime on heating elements, damaged heating elements, faulty probe | Descale boiler. If it persists: call technician for heating elements and probe check. |
| Long heating time | Excessive encrustations, partially faulty heating element, low voltage | Deep descaling. Verify network voltage. Technical check of heating elements. |
| Steam escaping from cabin | Worn door gaskets, door not properly closed | Verify door closure. Inspect gaskets. Replace if deteriorated. |
| Excessive noise during operation | Lime, defective solenoid valves, unfixed pipes | Descale. Check pipe fixings. Verify solenoid valves. |
| Unpleasant odor | Organic residues, incomplete drain, water stagnation | Deep boiler cleaning. Verify complete drain. Descale. |
4.2 Electrical Problems
| Problem | Probable Cause | Solution |
|---|---|---|
| Display does not turn on | Power outage, J2 connection disconnected, faulty board | Verify power supply. Check panel cable (code EE). Call technician. |
| Circuit breaker trips | Electrical leakage, faulty heating element, water infiltration | DO NOT turn on again. Call electrician technician. |
| Generator does not start | Safety thermostat tripped, faulty probe, control board | Wait for complete cooling. Reset thermostat. Call technician. |
4.3 Hydraulic Problems
| Problem | Probable Cause | Solution |
|---|---|---|
| Very slow filling | Low pressure, clogged filter, partially closed solenoid valve | Verify network pressure (min 0.2 MPa / 2 bar). Clean filter (if present). Check solenoid valve. |
| Failed filling (error -E) | Tap closed, faulty solenoid valve, obstructed pipe | Open tap. Verify pipe. As long as error is indicated, heating elements remain off. Turn off and on again after opening water. |
| Water leaks from generator | Worn gaskets, damaged welds, boiler cracks | Turn off immediately. Close supply. Call technician. |
| Incomplete drain (error dd) | Drain pipe obstructed, defective solenoid valve | Verify drain pipe is clear. Check drain solenoid valve. |
5 Extraordinary Maintenance
5.1 Electric Heating Element Replacement
WARNING: Intervention to be performed ONLY by authorized specialized technician.
The heating element must be replaced when:
- It presents massive lime encrustations that cannot be removed
- It is visibly damaged or corroded
- Electrical test shows circuit interruption
- The generator takes more than double the normal time to generate steam
5.2 Door Gasket Replacement Procedure
Cabin door gaskets can be replaced by the user:
- Purchase original Beauty Luxury gaskets for the specific model
- Remove old gaskets from door profiles
- Thoroughly clean grooves with cloth and alcohol
- Insert new gaskets starting from the upper corner
- Press with fingers along the entire profile to ensure adherence
- Verify that there are no non-adherent points or folds
- Test door closure and steam seal with test cycle
5.3 Opacified Acrylic Panel Treatment
If acrylic panels show opacification or micro-scratches:
- Wash with water and neutral detergent, dry
- Apply acrylic-specific polish with soft cloth
- Polish with circular movements for 2-3 minutes
- Remove residues with clean slightly damp cloth
- Dry with soft dry cloth
WARNING: For deep scratches or cracks, panel replacement is necessary. Contact Beauty Luxury support for original spare parts.
6 Water Softener Installation (Hard Water)
In areas with very hard water, installing a water softener is strongly recommended to extend generator life.
6.1 Softener Benefits
- Lime formation reduction up to 90%
- Lower descaling frequency
- Increased heating element useful life
- Lower extraordinary maintenance costs
- Constant performance over time
6.2 Installation
The softener must be installed on the water supply line before the generator:
- Choose softener with adequate flow rate
- Install between main tap and generator inlet
- Connect regeneration drain to sewer drain
- Set target residual hardness: 8-10°F
- Verify correct resin regeneration according to instructions
- Refill salt periodically
NOTE: Installing a softener does not eliminate the need for descaling, but drastically reduces frequency.
7 Tips to Extend Turkish Bath Life
7.1 Daily Good Practices
- Always leave the door open for 30 minutes after use for aeration
- Dry surfaces with soft cloth after each use
- Do not use the Turkish bath more than once a day (respect cooling time)
- Verify that automatic drain always completes (display "-d")
- Avoid pouring cosmetic products inside the cabin
- Clean connections before installation
7.2 Problem Prevention
- Install softener if you have very hard water
- Strictly respect descaling frequencies
- Do not postpone scheduled maintenance interventions
- Use only original Beauty Luxury spare parts
- Rely on certified technicians for extraordinary interventions
- Keep maintenance log to monitor progress
- Do not install generator in humid, wet, frozen environments
7.3 Signs Requiring Immediate Technical Intervention
Contact support immediately in case of:
- Visible water leaks from generator
- Repeated tripping of circuit breaker/differential switch
- Abnormal noises or high-pitched whistles during steam generation
- Persistent error code after reset
- Total absence of steam with functioning heating elements
- Burning smell or melted plastic
- Significant variations in heating times
NOTE: Regular and preventive maintenance can make a Turkish bath last over 15-20 years maintaining optimal performance. Negligence can reduce useful life with high repair costs.