1 Weekly Routine Maintenance
Regular maintenance ensures long life and optimal performance of the infrared sauna.
WARNING: ALWAYS perform all maintenance operations with the sauna turned off and cooled. Disconnect from the electrical network in case of long periods of non-use.
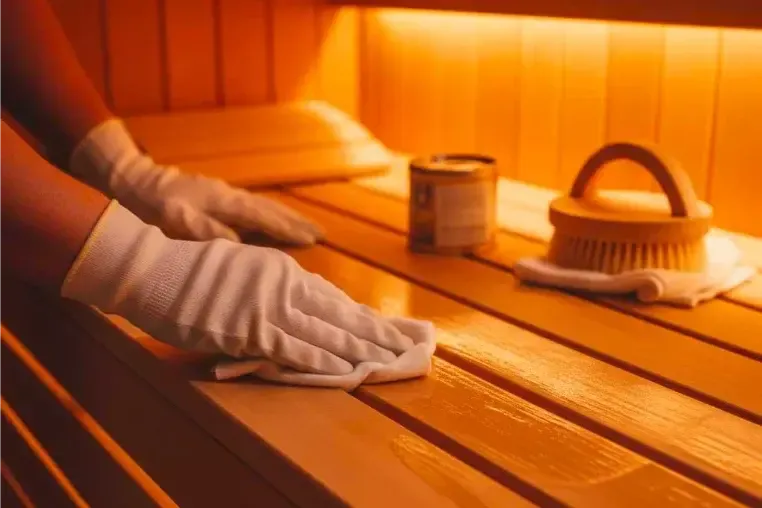
1.1 Cleaning Wooden Surfaces
- Turn off the sauna and let cool completely (min 1 hour)
- Open the door completely for ventilation
- Wipe all wooden surfaces with dry microfiber cloth
- Remove sweat traces from benches with slightly damp cloth
- Dry immediately with dry cloth
- Leave door open for 30 minutes for complete aeration
NOTE: Wood must always be dry. Moisture can cause stains, deformation and mold.
1.2 Recommended and Prohibited Products
| Surface | Recommended Products | Prohibited Products |
|---|---|---|
| Interior wood | Dry microfiber cloth, soaked with water ONLY if necessary | Detergents, solvents, bleach, scented oils, waxes |
| Benches | Damp cloth (pure water), diluted baking soda for stains | Soaps, degreasers, abrasive products |
| Glass door | Neutral glass cleaner, microfiber cloth | Abrasive products, steel wool, pure alcohol |
| Infrared panels | Only gentle dry cloth - DO NOT touch surface | Water, detergents, any liquid |
| Protection grilles | Dry cloth, vacuum with soft brush | Direct water, liquid detergents |
1.3 Cleaning Glass Door
- Spray neutral glass cleaner or denatured alcohol on microfiber cloth (NEVER directly on glass)
- Clean interior and exterior glass with circular movements
- Dry with dry cloth to avoid streaks
- Clean door frame with damp cloth
- Check hinge and handle operation
1.4 Cleaning Panel Protection Grilles
The wooden grilles protect the infrared panels and require regular cleaning:
- Pass dry cloth between the grille slots
- Use vacuum with soft brush for accumulated dust
- DO NOT wet the grilles - only dry cleaning
- Verify that grilles are always securely fastened to panels
WARNING: DO NOT remove the protection grilles. They serve to maintain safety distance (10 cm) from hot panels.
2 Monthly Maintenance
2.1 Deep Wood Cleaning
Once a month perform more thorough cleaning:
- Prepare solution: warm water + 1 tablespoon baking soda per liter
- Dampen (not wet) microfiber cloth in solution
- Wring cloth well - it should be barely damp
- Wipe all wooden surfaces with movements in the direction of grain
- Dry immediately with dry cloth
- Leave door open for 2 hours for complete drying
- DO NOT use the sauna until wood is completely dry
2.2 Electrical Components Check
Visually inspect (with sauna off and cold):
| Component | Check | Action if Anomaly |
|---|---|---|
| Power cable | No damage, abrasions, excessive bends | Replace immediately if damaged |
| Control unit connectors | All inserted, none loose | Reinsert firmly until click |
| Control panel | Display readable, buttons functioning | Call service if malfunctions |
| Temperature sensor | Positioned in roof hole, protrudes 1 cm | Reposition correctly |
| Infrared panels | Surface intact, no deformation | Call service if damaged |
| LED lighting | Light functioning | Replace LED if burned out (technician) |
| Speakers | Clear audio without distortion | Check connection, call service |
2.3 Functional Test
Perform a complete test cycle:
- Turn on sauna
- Set temperature 50°C, timer 15 minutes
- Activate heating
- Verify display shows increasing temperature
- Test lighting (button 6)
- Test audio system (all sources)
- Test ozonator if present (button 7 - empty cabin)
- Verify automatic shutdown when timer expires
3 Semi-Annual Maintenance
3.1 Structural Check
Verify structure integrity:
- Check that all snap hinges are properly hooked
- Verify absence of cracks or fissures in wood panels
- Check stability of benches and backrests
- Verify door opens and closes correctly without forcing
- Check door glass for cracks or deep scratches
- Verify sauna leveling (with spirit level)
- Check that base has not moved
3.2 Infrared Panel Cleaning
WARNING: Delicate operation - perform with maximum care.
- Sauna off and cold for at least 2 hours
- Disconnect electrical power
- Use ONLY dry and very clean microfiber cloth
- Gently pass over panel surfaces (visible through grilles)
- Remove accumulated dust
- DO NOT press, DO NOT wet, DO NOT use products
- Reconnect power
- Operation test
NOTE: Infrared panels are delicate elements. Excessive dust reduces thermal efficiency.
4 Medium/Long Term Periodic Maintenance - Specialized Technician
Once every 2-3 years we recommend having maintenance inspection performed by authorized Beauty Luxury technician:
| Component | Technical Intervention |
|---|---|
| Electronic control unit | Visual board check, connection test, operating parameter verification |
| Infrared panels | Power output test, heating uniformity check, resistance inspection |
| Temperature sensor | Sensor calibration, reading accuracy test, safety thermostat check |
| Electrical system | Insulation test (megohmmeter), grounding verification, tightening check |
| Lighting | LED and auxiliary service test, lamp replacement if necessary |
| Ozonator | Operation test, O3 production verification, auto-shutdown timer check |
| Wood structure | Integrity verification, hinge check, door hinge lubrication |
| Glass door | Integrity check, gasket verification, frame alignment |
4.1 Standard Component Replacement
| Component | Average Lifespan | Replacement Signs |
|---|---|---|
| Infrared panels | 10-15 years | Slow heating, cold zones, doubled heating time |
| Temperature sensor | 5-8 years | Inaccurate readings, unstable temperature, frequent errors |
| LED lamps | 30000-50000 hours | Dim light, flickering, failure to turn on |
| Speakers | 8-12 years | Audio distortion, low volume, no sound |
| Electronic control unit | 10-15 years | Display errors, malfunctions, frequent resets |
4.2 Wood Treatment
Every 2/3 years wood treatment may be necessary:
- Thoroughly clean all wooden surfaces
- Let dry completely (24 hours)
- Apply sauna-specific oil
- Follow wood grain direction
- Let absorb for 2-3 hours
- Remove excess with dry cloth
- Let dry 48 hours before use
- Perform 2 empty heating cycles (50°C, 30 min) before use
NOTE: Use ONLY sauna-specific oils, without fragrances or chemical additives. Unsuitable oils can release toxic fumes during heating.
5 Common Problems and Solutions
5.1 Heating Problems
| Problem | Probable Cause | Solution |
|---|---|---|
| Sauna does not heat | Heater not activated, panels disconnected | Press button 5 (Heater). Check all C connectors inserted in control unit. |
| Very slow heating | Dirty infrared panels, accumulated dust | Clean panels with dry cloth. Verify protection grilles are clean. |
| Temperature not reached | Temperature sensor misplaced or faulty | Verify sensor protrudes 1 cm from roof hole. Call technician if persists. |
| Unstable temperature | Defective sensor, faulty thermostat | Call service for sensor replacement or thermostat check. |
| Cold zones in sauna | One or more panels not working | Check C connections. If connected: faulty panel, call service. |
5.2 Electrical Problems
| Problem | Probable Cause | Solution |
|---|---|---|
| Display does not turn on | GFCI on cable OFF, outlet not powered, G connector disconnected | Check GFCI ON. Test outlet. Check G connector inserted and ring screwed. |
| GFCI trips repeatedly | Electrical leakage, moisture infiltration | DO NOT restart. Call qualified electrician. |
| Keypad locked | Automatic lock after 2 min inactivity | Normal. Press button 1 (Power) to unlock. Padlock icon disappears. |
| Lighting does not work | Burned LED, D/E connectors disconnected | Check D (LED) and E (auxiliary) connectors inserted. If OK: LED replacement by technician. |
5.3 Audio Problems
| Problem | Probable Cause | Solution |
|---|---|---|
| No sound | Volume at zero, F connector disconnected, faulty speakers | Increase volume (cursors 2). Check F connector inserted. Test with different sources. |
| Bluetooth does not connect | Pairing not performed, device Bluetooth OFF | Select BT (button 4). Activate BT on device. Search and pair sauna. |
| FM radio absent or disturbed | Antenna not connected, poor reception area | Check Y antenna connected. Try automatic memory (button 3 then 8). |
| USB not recognized | File format not MP3, damaged USB drive | Check MP3 files. Try another USB drive. Format USB in FAT32. |
| Distorted audio | Volume too high, damaged speakers | Reduce volume. If persists at low volume: call service. |
5.4 Structural/Wood Problems
| Problem | Probable Cause | Solution |
|---|---|---|
| Dark stains on wood | Sweat not cleaned, residual moisture | Clean with diluted baking soda. Always dry after use. Treat with sauna oil. |
| Dull or dry wood | Lack of periodic treatment | Apply sauna-specific oil. |
| Cracks in wood | Normal wood shrinkage, excessive moisture | Small cracks: normal. Large cracks: check room moisture, call service. |
| Door does not close well | Structure not level, loose hinges | Check base leveling. Check hinge tightening. Lubricate if necessary. |
| Unstable panels | Snap hinges not fully engaged | Press panels until "click" heard from all hinges. Verify engagement. |
| Unpleasant odor | Mold from poor ventilation | Always leave door open after use. Treat wood with oil. Ventilate room. |
6 Ozonator - Specific Maintenance
If the sauna is equipped with ozonator:
6.1 Correct Use for Longevity
- Use ONLY with completely empty cabin
- Recommended frequency: 1 time weekly for home use, 2-3 times for intensive use
- Let complete 30-minute cycle
- Ventilate 10 minutes before sauna use
- DO NOT interrupt cycle repeatedly
6.2 Malfunction Signs
- Absence of characteristic ozone smell after cycle
- Cycle ends before 30 minutes
- O3 symbol does not appear on display
- No visible sanitizing effect
In case of malfunction: call service for O3 generator check.
7 Prolonged Non-Use Period
If the sauna will not be used for over 1 month:
7.1 Preparation
- Thoroughly clean entire sauna
- Let dry completely (door open 48 hours)
- Disconnect electrical power
- Leave door ajar for ventilation
- Cover with breathable sheet (NOT plastic)
- Place moisture absorber bags inside
7.2 Reactivation After Non-Use
- Remove cover and moisture absorber bags
- Ventilate sauna with door open for 2 hours
- Visually check structure integrity
- Wipe all surfaces with dry cloth
- Reconnect electrical power
- Run ozonator cycle (30 min) if present
- Perform 2 empty heating cycles (50°C, 30 min)
- Perform complete functional test
- Sauna ready for use
8 Tips to Maximize Lifespan
8.1 Daily Good Practices
- ALWAYS leave door open 30 minutes after each use
- Wipe benches with dry cloth after each session
- Use towel to sit on (hygiene + wood protection)
- Do not pour water or other liquids inside
- Avoid oils, creams or perfumes that can stain wood
- Respect 5-minute shutdown period between consecutive sessions
8.2 External Environment
- Install in room with controlled humidity (40-60%)
- Avoid excessively humid rooms (bathrooms without ventilation)
- Maintain room temperature 15-25°C
- Avoid direct sunlight exposure on wood
- Ensure adequate room ventilation
8.3 Conscious Use
- Do not exceed maximum temperature 60°C (actual achievable)
- Do not exceed 90 continuous minutes of operation
- Respect declared person capacity (overload accelerates wear)
- Clean immediately any accidentally spilled liquids
- Report anomalies immediately to service
8.4 Damage Prevention
- DO NOT touch infrared panels during operation
- DO NOT remove protection grilles
- DO NOT modify electrical wiring
- DO NOT use extension cords for power
- DO NOT hang objects on interior walls
- DO NOT use air fresheners or candles inside
NOTE: Use ONLY original Beauty Luxury spare parts. Non-original parts can compromise safety, performance and warranty.