1 Environment Preparation
Before proceeding with the infrared sauna installation, it is necessary to adequately prepare the environment that will house it.
1.1 Space and Floor Requirements
| Requirement | Specification |
|---|---|
| Minimum surrounding space | 10-15 cm per side |
| Ceiling height | Minimum 200 cm |
| Floor | Flat, level, dry |
| Level tolerance | ±3 mm/meter |
| Recommended materials | Tiles, parquet, laminate, resin |
| Floor load capacity | 200-300 kg/m² |
NOTE: The infrared sauna can be installed in any dry indoor environment: bathroom, bedroom, basement, gym.
WARNING: DO NOT use outdoors or in the rain. DO NOT use in humid environments.
1.2 Room Ventilation
Unlike the Finnish sauna, the infrared sauna does not require a forced ventilation system but it is sufficient to have:
- Well-ventilated room with possibility of air exchange after use
- Absence of excessive humidity in the room
- Avoid installation in completely sealed rooms
1.3 Safety Distances
Respect the following minimum distances:
| Element | Minimum Distance |
|---|---|
| Rear wall | 10 cm |
| Side walls | 10 cm |
| Ceiling | 10-20 cm |
| Electrical outlet | Accessible within 2 meters |
2 Electrical Requirements
2.1 Electrical Line Characteristics
The infrared sauna requires standard single-phase electrical power:
| Number of People | Total Power | Voltage | Circuit Breaker |
|---|---|---|---|
| 1-2 people | 1200-1500 W | 220-240V Single-phase | 10A |
| 2-3 people | 1500-2000 W | 220-240V Single-phase | 16A |
| 3-4 people | 2000-2500 W | 220-240V Single-phase | 16A |
| 4-5 people | 2500-3000 W | 220-240V Single-phase | 20A |
2.2 Mandatory Requirements
- Dedicated line with differential circuit breaker (GFCI 30mA)
- Copper cable with heat-resistant insulation
- Efficient and certified grounding
- Compliance with electrical standards
NOTE: Unlike the Finnish sauna, most infrared saunas can be connected to a standard 16A domestic outlet. Always verify the power of the specific model.
3 Structure Assembly
The infrared sauna is supplied in a prefabricated kit ready for assembly.
3.1 Kit Components
- Pre-assembled wooden wall panels
- Pre-wired infrared radiant panels
- Tempered glass door with frame and hinges
- Ventilated roof
- Benches and backrests
- Digital control panel
- Pre-installed electrical wiring
- Screws and hardware
3.2 Basic Assembly Procedure
- Verify presence of all components from the packing list
- Position the base floor in the final position
- Mount the side panels according to the provided diagram
- Assemble the rear wall with integrated infrared panels
- Install the side walls with infrared panels
- Mount the door frame and hang the door
- Position the ventilated roof
- Install benches and backrests
- Connect the wiring to the control panel
- Perform operation test
WARNING: Estimated assembly time 1-2 hours for 2 people. Always consult the specific model manual.
4 Infrared Panel Installation
Infrared panels are pre-installed in the walls.
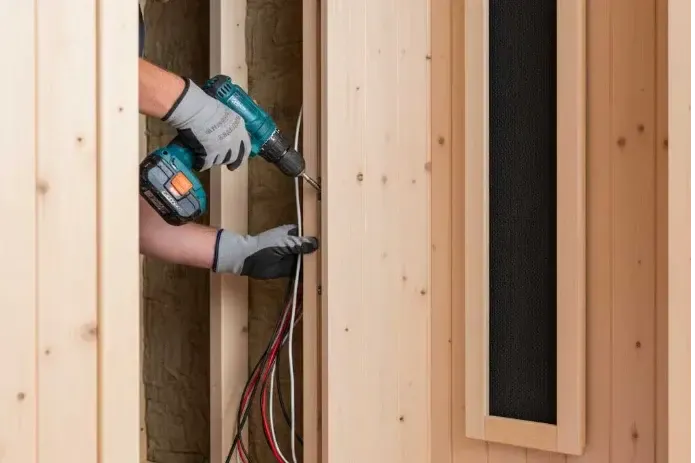
5 Panel Electrical Connection
5.1 Wiring System
All panels are connected in parallel to the main control panel:
- Connect each panel to the pre-installed main wiring
- Verify that the connectors are fully inserted
- Connect the main cable to the control panel
- Connect temperature sensor in the indicated position
- Connect lighting and optional accessories
- Connect main power cable to the outlet
WARNING: Do not modify the pre-installed wiring. Any modification voids the warranty and safety certification.
5.2 Control Panel
The control panel manages:
- Automatic on and off
- Temperature adjustment (35-65°C)
- Programmable timer (10-60 minutes)
- Real-time temperature monitoring
- Chromotherapy control (if present)
- Audio system (if present)
6 First Start-Up
6.1 Pre-Start Checks
- Verify that all panels are correctly secured
- Check that all electrical connections are complete
- Verify that the door opens and closes correctly
- Check stability of benches and backrests
- Verify temperature sensor positioning
- Remove any plastic protection from the panels
6.2 First Start-Up Procedure
- Plug the plug into the electrical outlet
- Turn on the main switch on the control panel
- Set temperature to 50°C
- Set timer to 30 minutes
- Start heating
- Verify that all panels light up progressively
- Wait 15-20 minutes and verify temperature is reached
- Check for absence of abnormal odors (slight odor during first start-ups is normal)
NOTE: During the first 2-3 start-ups it is normal to perceive a slight odor due to the initial heating of paints and materials. Ventilate the room well.